Sewing Machine TLC

Heyyy Youu Guyyyyys!

I have encountered another first fellow crafters- the sewing machine service!

Now obviously my machine decided to shout at me slap bang in the middle of a big project for my good friend Emma at My Vintage, so I was a tad frightened! I couldn’t afford to send my machine away to be fixed, let alone buy a new one if it was truly dead. So, I took to Google and low and behold I found the answer, and like a good blogger and Pinterest ADDICT I pinned it and read it. This is an eBay post from a sewing machine specialist/wizard who decided to write a helpful guide as to what to do if your machine stops working, as more often than not it just needs a good clean! So I duly headed to my Dad’s cellar and hunted around. From my time in the Army Cadets I knew a brush would be needed and some oil! Anything with moving parts needs dusting and anywhere where metal brushes against metal needs oiling. Simple Fact. I also grabbed some long nose pliers (tweezers would work just as well) just in case I needed to pick dirt out, and I grabbed a flat head screwdriver, some WD40 (life-saving oil 101!) and a torch! I then went to my tutorial and got quite scared. Like I said before I couldn’t afford to replace my machine, so I didn’t want to begger it up using the wrong tools! And it stressed to refer to your manual (which I didn’t have), and NOT to use ANY other oil other than Sewing Machine Oil. Now, I’m very lucky as I work in a haberdashers so I was able to pick up a maintenance kit and sewing machine oil pretty sharpish for £3.19 and £1.79 respectively. HOWEVER! I happen to know that Sewing machine oil is in most Pound Shops around here (or Dollar Stores for our cousins over the pond) and in my maintenance kit I got two screwdrivers and a nylon brush. Now, the nylon brush is handy as it is the BEST for picking up dust and dirt but you could use a simple paintbrush if you wanted. As far as the screwdrivers go, it turned out that I had a tool in my sewing machine’s secret compartment! After returning to my tutorial it turned out I would have been OK with what I already had in my house, except the machine oil which needed to be bought… *facepalm*. (Oh, and I managed to download my machine’s manual for FREE!)

I consoled myself slowly, “Of course the maintenance kit is going to be good as it’s what it’s designed for” la de da, so if you do have the extra pennies it’s a good investment, and for £3.19 it wasn’t too bad 😉 however it isn’t 100% necessary.

The tutorial really covers most things, as will your manual if you have it/can download it. Rule of thumb is: Dust down first, especially around the dog feeders (the little teeth that move your fabric). If metal is rubbing against metal, oil it! Not too much, you’ll only need a drop (or two at most!).  I was certain my machine was truly broken, but it turned out the it just needed a spring clean, and a new needle.

I feel silly for panicking,I should have put my thinking cap on and thought logically and thriftily, but for £5 worth of stuff I saved a £150 service bill. Looking at those figures… I ain’t even mad!

Stay tuned for a lovely Minerva Post hitting the KB Blog this Friday! This will DEFINITELY make up for any thrift-faux pas I made this week!

Craft or Glory!

Katie B xo

My First Post for the Minerva Blogger Network!

I’m proud to announce that my first post for the Minerva Blogger Network is now Live!

Click here to go to the tutorial!

If you like what you see? You can buy the complete kit here!

Now my Star Spangled Banner clutch makes sense, doesn’t it? ;D

Craft or Glory!

Katie B x

Star Spangled Banner Clutch!

Hello There!

I’ll tell you now, I’m not American. I do, however, love national flags! I also love any excuse to craft, so with Thanksgiving this week for our cousins across the pond, I thought this project would be perfect. Now, this post is actually a continuation of a post yet to come (Bit Timey-Wimey, all will become apparent)! My first Minerva Blogger Network post will be launching  Saturday 7th December, and the first Saturday of every month following that. In the spirit of all things thrifty, I made this using the left overs from this project and used it as my first “Absolute Beginners” post, where I’ll be trying things out for the first time. Today’s new joy is interfacing. Wikipedia hits the nail on the head with its description:-

Interfacing is a textile used on the unseen or “wrong” side of fabrics to make an area of a garment more rigid. interfacing can be used to:

  • stiffen or add body to fabric, such as the interfacing used in shirt collars
  • strengthen a certain area of the fabric, for instance where buttonholes will be sewn
  • keep fabrics from stretching out of shape”

It’s also commonly used in handbags, which is what I’ll be using it for today. I used a single sided Iron-On interfacing, which I found quite handy, however a Sew-In in also available (Double sided is available too which is akin to double-sided sticky tape in that it will fuse on both sides!). Interfacing usually starts from around £1 per metre, and it can be tempting to leave it out to save those pounds, but sometimes it is needed. So always think about how thick the fabric you’re using is, and what kind of finish you’d like.

Now, to the project in hand!

Ta-Dah

The clutch itself is a very basic shape. I used an A4 sheet of paper as a size guide, as this was how big I wanted my finished item to be, and a big ol’ leaflet that a “large cable TV company” posted through our front door (Thank you Mr. Branson). I created a template by marking 3 rectangles next to each other, long edges together. You can amend this to any size or shape you want. In the end rectangle I marked the centre of the end long edge, and created a triangle to form the flap of the clutch, leaving 1cm between the bottom of the triangle and the beginning of the central rectangle.

My Template

Using your template, cut out your main fabric, your interfacing, and your lining, remembering to leave seam allowance.

Now it’s time to iron on your interfacing. If you’re using sew-in interfacing this is where you’d also pin your lining!

First of all, take a small off cut of material and an off cut of interfacing. Fold the material in half and place the interfacing inside to make a sandwich, if you will, and iron. Now you can tell which side is fusible, and you won’t fuse your interfacing to your ironing board!

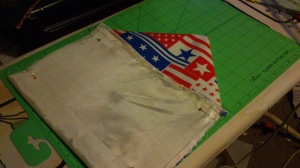
Place the fusible side of your interfacing to the wrong side of the fabric, and lay down flat and in-line with your fabric and begin to iron. You want to use your iron as more of a heat press, as opposed to moving it about as you would ironing a shirt. A little wiggle here and there helps, as does steam, but you want to fuse your interfacing is stages, working from the centre out. You can use a pillow-case or tea-towel as a barrier but for the photos I ironed straight onto my material.

Ironing

Now it time to pin your lining. Place the correct side of the lining to the correct side of your fabric and pin, only, the flap of the bag and the very bottom seam.

Flap Pin

Sew where you’ve pinned leaving the sides open.

Flap Seam

Pretty Seams 🙂

Bottom Seam


Turn the  right way out. I used magnets as fasteners, so this is where I glued them inside the bag between the main fabric and the lining. Make sure you get good quality magnets! Otherwise they won’t be strong enough through the fabric :). If I was to do it again, I’d use a different clasp method.

Fold the bottom seam up to meet the base of the flap and pin the sides. You should be able to see the correct side of the lining. Sew where you’ve pinned.

Final Pin


Turn the bag the right way out and Tah-Dah! Star Spangled Banner Clutch. So if you’re looking for a last-minute Thanksgiving gift for someone, or a Christmas present, whip this up! It took about an hour, and that included taking pictures!

Hope this helped, and hope to hear from you soon.

Craft or Glory!

Katie B